1. Opening – Straight Into It
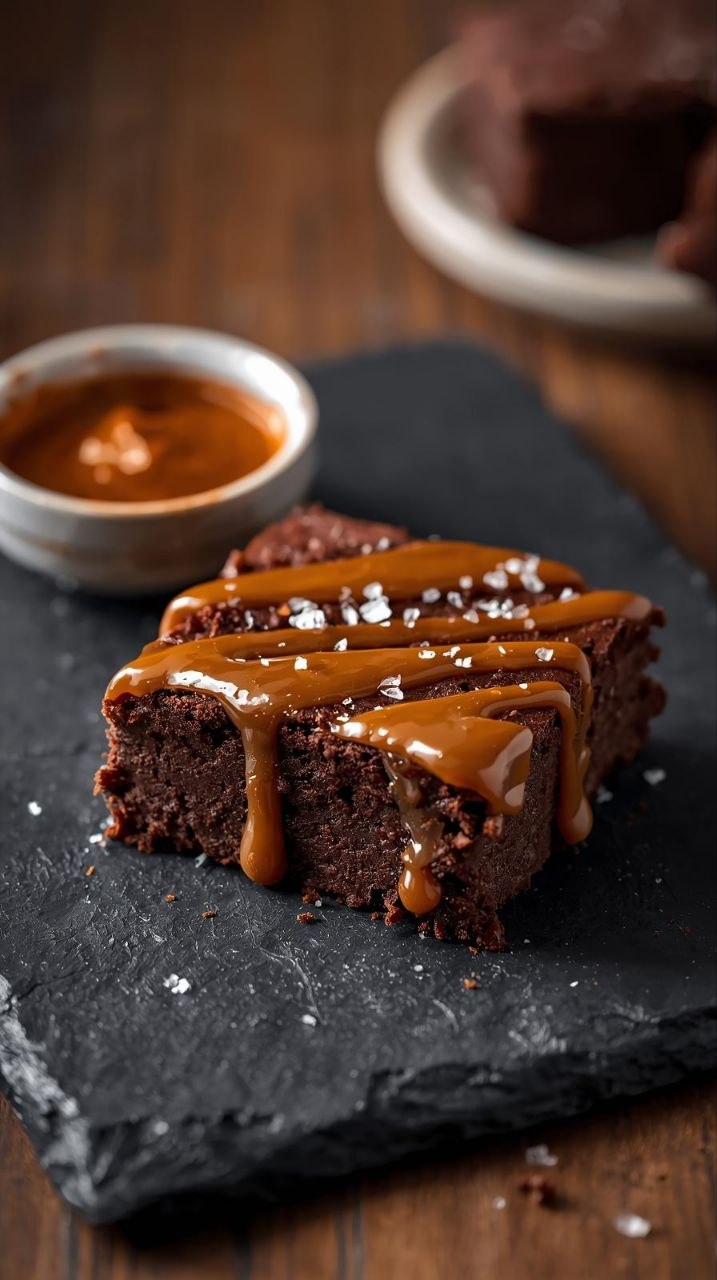
Black Bean Brownies are something I usually make when I’ve got a chocolate craving but also don’t feel like dealing with heaps of bowls, flour dust everywhere, and a sink full of dishes at 8:30 at night. They land somewhere between dessert and “snack that feels slightly responsible,” which is handy when it’s been one of those long workdays where dinner already felt like enough effort.
I first made Black Bean Brownies out of curiosity more than anything. I’d seen them floating around for ages and figured it sounded a bit dodgy but also interesting enough to try once. Turns out they’re properly decent. They come out fudgy, chocolatey, and they hold together well enough to chuck in a container for later without turning into crumbs.
These usually show up at my place when I want something sweet but don’t want to run to the shops again. Most of the ingredients live in the pantry already, which makes it feel like less of a mission. They also work when someone drops by unexpectedly and you want to offer something that looks like you made an effort, even if you really just threw it together while waiting for the kettle.
They’re not trying to replace regular brownies. They’re just a different version that works when you want simple homemade food without fussing over technique or hunting down fancy ingredients.
2. How This Fits Into My Week
I mostly make Black Bean Brownies midweek, usually on a Wednesday or Thursday night when the week starts dragging a bit and I feel like I deserve something sweet but also can’t be bothered baking properly. It’s the sort of recipe that doesn’t require heaps of brainpower, which is handy when my energy level is sitting somewhere between “I should cook” and “toast again sounds fine.”
They’re also good for Sundays when I’m poking around the kitchen trying to use up random pantry bits before grocery day. Black beans tend to linger in the cupboard because I buy them for chilli or tacos and forget they exist. This gives them a job.
Energy-wise, it’s low. You mostly just blend things, pour it into a tin, and chuck it in the oven. I don’t need to measure perfectly or stand around babysitting it. I can usually get them in the oven while dinner’s cooking or while I’m scrolling on my phone pretending I’m about to fold laundry.
In winter, I probably make them more often. Something about turning the oven on feels less offensive when it’s cold and getting dark early. In summer, I still make them, but I tend to bake them later at night once the kitchen isn’t boiling.
They’re also good when I know I’ll want something sweet over a few days because they keep fairly well without needing anything fancy storage-wise.
3. Ingredients (Loose & Flexible)
One of the reasons I keep making Black Bean Brownies is because the ingredient list is forgiving. It’s very much a “use what’s around” situation rather than a strict shopping list.
Essentials (The Stuff I Don’t Skip)
- Tinned black beans (drained and rinsed)
- Cocoa powder
- Eggs
- Some kind of sweetener (sugar, brown sugar, maple syrup, honey — all work differently but still fine)
- Oil or melted butter
- Vanilla extract
- Baking powder
- Pinch of salt
That’s basically the backbone. If I’ve got those, brownies happen.
Chocolate Situation
I nearly always add chocolate chips or chopped chocolate because it makes the texture better and gives little melted pockets through the brownie. But I’ve forgotten it before and they still worked. Just less indulgent, I guess.
Sweetener Swaps I Use
I’ve used:
- White sugar when I want a cleaner chocolate flavour
- Brown sugar when I want them softer and a bit deeper tasting
- Maple syrup when I’m low on sugar (they come out slightly more moist)
Sometimes I mix sweeteners if I’m running low. They’re forgiving.
Fat Options
- Neutral oil like vegetable or canola is my usual
- Melted butter works and tastes a bit richer
- Coconut oil works but adds a faint coconut thing (not bad, just noticeable)
Extras I Throw In Sometimes
- Walnuts or almonds if I’ve got a half-open bag hanging around
- Instant coffee powder (tiny bit boosts chocolate flavour)
- A spoon of peanut butter swirled through the top
- Dark chocolate chunks if I want them more dessert-like
Things I Skip Regularly
- Fancy chocolate percentages
- Special flours or replacements
- Toppings or icing
They don’t need it. The whole point is they’re easy.
4. Cooking Flow (NOT Instructions)
When I make Black Bean Brownies, I usually start by rinsing the beans properly. If I rush that part, you can absolutely taste the tin liquid later, which is not great. I just dump them in a colander and run cold water over them while shaking them around a bit.
Then everything pretty much goes into a blender or food processor. I’ve used both and they’re equally fine. The mixture always looks questionable at first. Kind of thick, dark, and not very brownie-like. I just keep blending until it smooths out properly.
I’ve learned not to rush the blending stage. The first time I made them, I stopped too early because it looked “good enough.” It wasn’t. The finished brownies had little bean bits through them which made the texture strange. Now I blend until it looks like thick chocolate batter with no lumps.
Once it’s smooth, I usually stir through chocolate chips by hand. If I blend them in, they disappear, which defeats the purpose.
I line a baking tin mostly because I hate scraping stuck brownies later. Sometimes I just crumple baking paper and shove it in roughly. Doesn’t need to look nice.
The batter is thicker than normal brownie batter. It spreads slowly, so I usually push it into corners with the back of a spoon.
While it bakes, the smell is the main indicator for me. It starts off smelling slightly beany, which worried me the first time. That disappears as it cooks and turns into normal chocolate brownie smell. That’s usually when I know it’s getting close.
I’ve made plenty of mistakes with these over time.
One time I forgot to rinse the beans entirely. I just tipped them straight from the tin into the blender. The brownies had this weird metallic, salty taste that didn’t bake out. They weren’t inedible but definitely disappointing. I always rinse now, no shortcuts.
Another time I overbaked them because I was waiting for them to feel firm like regular brownies. These never really do that while hot. They firm up later. Leaving them in too long made them dry and crumbly. Now I pull them out when the middle still looks slightly soft.
I’ve also underblended the batter before, which left tiny bean skins visible. Texture was off and you could tell something unusual was going on. Blending longer fixes that completely.
I once used way too much maple syrup thinking more liquid meant softer brownies. They never set properly and turned into something closer to chocolate pudding. Tasted fine but impossible to slice. Now I stick to roughly balanced wet ingredients.
Another mistake was skipping baking paper because I thought the tin was non-stick enough. It wasn’t. Half the brownie stayed welded to the tray. I scraped it out and still ate it, but it was messy and annoying.
Now my rhythm is pretty relaxed. Blend until smooth, spread it out, bake until it smells properly chocolatey, and let it cool longer than I want to.
Cooling is the annoying but important part. If I slice too early, they fall apart. If I leave them alone for an hour or so, they slice clean and get that fudgy centre.
Say “Next” and I’ll continue with:
- Tweaks I’ve Used
- Leftovers & Reheating
- Common Questions
- Wrap-Up
- Full Recipe Card
- Remaining long-form content to reach full target length
I’ll keep the voice, structure, and rules locked exactly as requested.
5. Tweaks I’ve Used
Black Bean Brownies are one of those things that I don’t treat like a fixed recipe anymore. Once I realised they work even when I change bits around, I stopped stressing about getting everything exactly right. It’s more like a template now that I adjust depending on what’s sitting in the pantry or how much effort I feel like putting in that night.
Protein Swaps I’ve Tried
Black beans are obviously the default, but I’ve experimented a bit when I’ve opened the cupboard and realised I don’t actually have them.
I’ve used kidney beans once when I was halfway through baking mode and didn’t want to go back to the shops. They worked alright flavour-wise, but they had a slightly firmer texture. Not bad, just not quite as smooth as black beans. I blend those longer now if I use them.
Chickpeas actually surprised me. I expected them to be too grainy or too obvious, but once blended properly with enough cocoa, they’re pretty convincing. The brownies end up slightly lighter in colour and maybe a touch less rich, but still solid.
I tried cannellini beans once and that was pushing it a bit. They worked structurally, but the flavour didn’t hide as well behind the chocolate. Still edible, just not something I rush to repeat.
Black beans definitely give the best result in my experience. They’ve got that softer texture and fairly neutral flavour once cooked.
Sweetener Changes
This one shifts around a lot depending on what’s nearly empty in the cupboard.
Brown sugar makes them softer and slightly chewier. If I want them to feel more like a dessert dessert, I lean that way.
White sugar gives a slightly firmer edge and a cleaner chocolate flavour. I use this when I want them to slice neatly and survive being packed into containers or lunchboxes.
Maple syrup is something I use when I feel like mixing things up or when there’s only a little sugar left. It makes them more moist and a bit denser. I’ve learned not to overdo it though because it makes them harder to set.
Honey works too, but it changes the flavour slightly. Not bad, just noticeable. I usually pair honey with dark cocoa so the chocolate stays strong.
Sometimes I mix two sweeteners if I’m running low on both. That’s happened more than once and hasn’t ruined anything yet.
Fat Swaps
Oil is the easiest. It’s predictable and doesn’t require extra effort.
Butter gives them a slightly richer smell while baking, which is nice if I’m already melting butter for something else. I don’t go out of my way to use it though.
Coconut oil works if that’s what’s around. It adds a faint coconut taste, which some people probably love. I don’t mind it, but it definitely shifts the flavour profile a bit. I usually pair coconut oil with dark chocolate chips to balance it out.
Chocolate Variations
I switch this around heaps.
Dark chocolate chunks give those proper melted pockets that stay soft even after cooling. That’s probably my favourite version.
Milk chocolate makes the brownies sweeter and softer. Good if I’m baking for people who prefer less intense chocolate.
I’ve also done a mix of chocolate chips and chopped chocolate when I had two nearly empty packets. That ended up being pretty good because the different sizes melt differently through the brownie.
Lazy Version vs Effort Version
The lazy version is literally just blend everything, pour, bake, done. No toppings, no mixing bowls, minimal cleanup. This is the version I make most often after work when I just want something sweet without committing to a big baking session.
The effort version isn’t actually that much harder, but it feels slightly more planned. That’s when I might:
- Toast nuts before adding them
- Melt chocolate into the batter for extra richness
- Swirl peanut butter or Nutella through the top
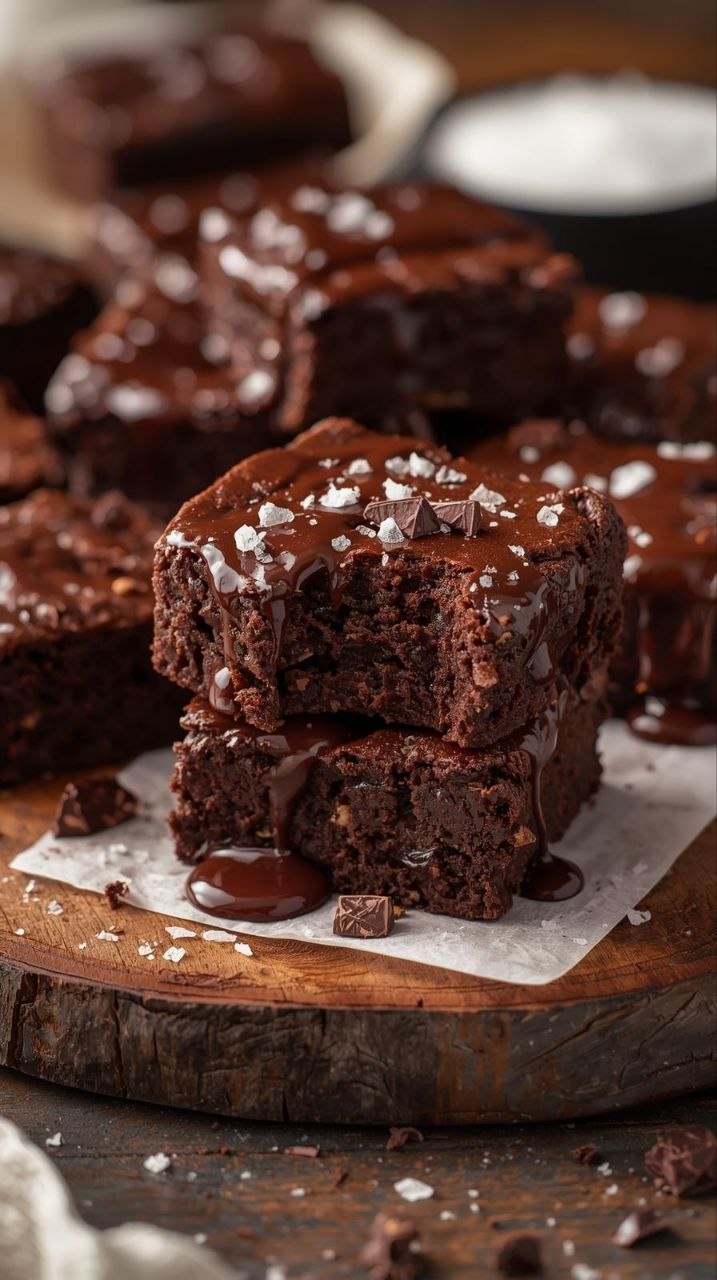
- Sprinkle flaky salt on top before baking
Those little extras make them feel more like something you’d serve to guests rather than something you’re cutting squares off while standing at the kitchen counter.
I don’t do the effort version often, but it’s good when I’ve got a bit more time on a weekend afternoon and want the house smelling like proper baking.
6. Leftovers & Reheating
These brownies actually hold up pretty well over a few days, which is one of the reasons I keep coming back to them.
I usually store them in an airtight container on the bench if the weather isn’t ridiculous. In cooler months they last about three days easily. In summer, I tend to move them to the fridge after the first day so they don’t go weird or sweaty.
Texture-wise, they change slightly as they sit. Fresh out of the oven and cooled, they’re quite soft and fudgy in the middle. By the next day, they firm up a bit and slice more cleanly. I actually like day-two brownies sometimes because they feel more structured but still moist.
Fridge storage makes them denser and slightly firmer. Not dry, just tighter. If I’m eating them straight from the fridge, I usually let them sit out for ten minutes or so. That softens them back up nicely.
Reheating isn’t essential, but it’s decent if I want them warm. I just microwave a piece for about 10–15 seconds. Any longer and they can get a bit rubbery, which isn’t great. A short burst warms the chocolate pockets and softens the crumb without messing with the texture too much.
Freezing works surprisingly well. I wrap individual squares and freeze them if I know I won’t get through the batch. They thaw pretty quickly on the bench and still taste like brownies, not freezer leftovers. The texture might be slightly softer once thawed, but nothing dramatic.
One thing that doesn’t hold up brilliantly is crunchy toppings like nuts sprinkled on top. They lose their crunch after a day or two. Nuts mixed into the batter hold their texture better.
7. Common Questions
Do they actually taste like beans?
Not really. If they’re blended properly and there’s enough cocoa and sweetener, you mostly just taste chocolate. The only time I’ve noticed bean flavour was when I didn’t rinse them properly or didn’t blend long enough.
Can I make them gluten free?
They already are, assuming all your ingredients are gluten free. I don’t do anything special to make that happen. They just naturally don’t use flour.
Do they taste the same as regular brownies?
They’re similar but not identical. They’re usually a bit denser and fudgier. I don’t expect them to be a direct copy of flour brownies. They’re just their own version that still scratches the chocolate brownie itch.
Can I reduce the sugar?
A little bit, yes. Too much reduction makes them taste more like dark cocoa and less like dessert. I’ve trimmed sugar slightly before and they were still fine, just less sweet overall.
Do kids notice they’re made with beans?
Depends on the kid, honestly. If they’re used to homemade baking, most don’t notice. If they watch you make them and see the beans go in, they might be suspicious before they try them.
8. Wrap-Up
I keep coming back to Black Bean Brownies because they’re reliable without needing much effort. They use ingredients I usually already have, they don’t create a massive mess, and they work whether I’m baking casually on a Sunday or just trying to make something sweet after dinner on a weeknight.
They also sit in that nice middle ground where they feel homemade and comforting but not heavy or over-the-top. I don’t have to measure everything perfectly, and they’re forgiving if I swap ingredients around based on what’s left in the cupboard.
Mostly, they just suit real life cooking. No complicated prep, no fancy gear, and no stress if they come out slightly different each time. They’re consistent enough to trust but flexible enough that I don’t get bored making them.
RECIPE CARD
Black Bean Brownies
Prep Time: 10 minutes
Cook Time: 25–30 minutes
Servings: 9–12 squares
Ingredients
- 1 tin (400g) black beans, drained and rinsed
- 2 eggs
- 1/3 cup cocoa powder
- 1/2 cup sugar (white, brown, or maple syrup)
- 1/4 cup oil or melted butter
- 1 teaspoon vanilla extract
- 1/2 teaspoon baking powder
- Pinch of salt
- 1/2 cup chocolate chips or chopped chocolate (optional)
Method
- Preheat oven to 180°C and line a small baking tin with baking paper.
- Blend black beans, eggs, cocoa powder, sugar, oil, vanilla, baking powder, and salt until smooth.
- Stir through chocolate chips if using.
- Spread mixture into prepared tin.
- Bake for 25–30 minutes until the centre is just set.
- Cool completely before slicing.
If you want, I can also:
- Write matching Pinterest descriptions
- Create SEO titles and meta descriptions
- Format this for WordPress/Mediavine layout
- Generate internal linking suggestions
- Produce 5–10 similar recipe variations using the same persona
Just say the word.